Time Tracking
Track work with a timer or manual entry, then review time across projects, people, and delivery periods.
Time tracking connects the work happening in tasks with a workspace-wide report. Use a running timer while you work, or add time manually when you are recording it afterwards.
Start and stop a timer
Open a task's menu and choose Track time to start with the task, project, and description already filled in. You can also use the timer in the bottom-left corner of Lane when the work is not tied to a task.
The timer starts as billable. Expand it to change the description, project, task, or billable setting. Lane allows one running timer per person; starting another one stops and saves the previous timer automatically.
Add time manually
Open Time in the workspace navigation and choose Add time. Enter a description and duration, choose whether the work is billable, then save the entry. When you open Time from a project, the new entry is assigned to that project automatically.
Review workspace time
The workspace Time page brings tracked, billable, and non-billable time together. Choose a project to include its planned time and current budget figures.
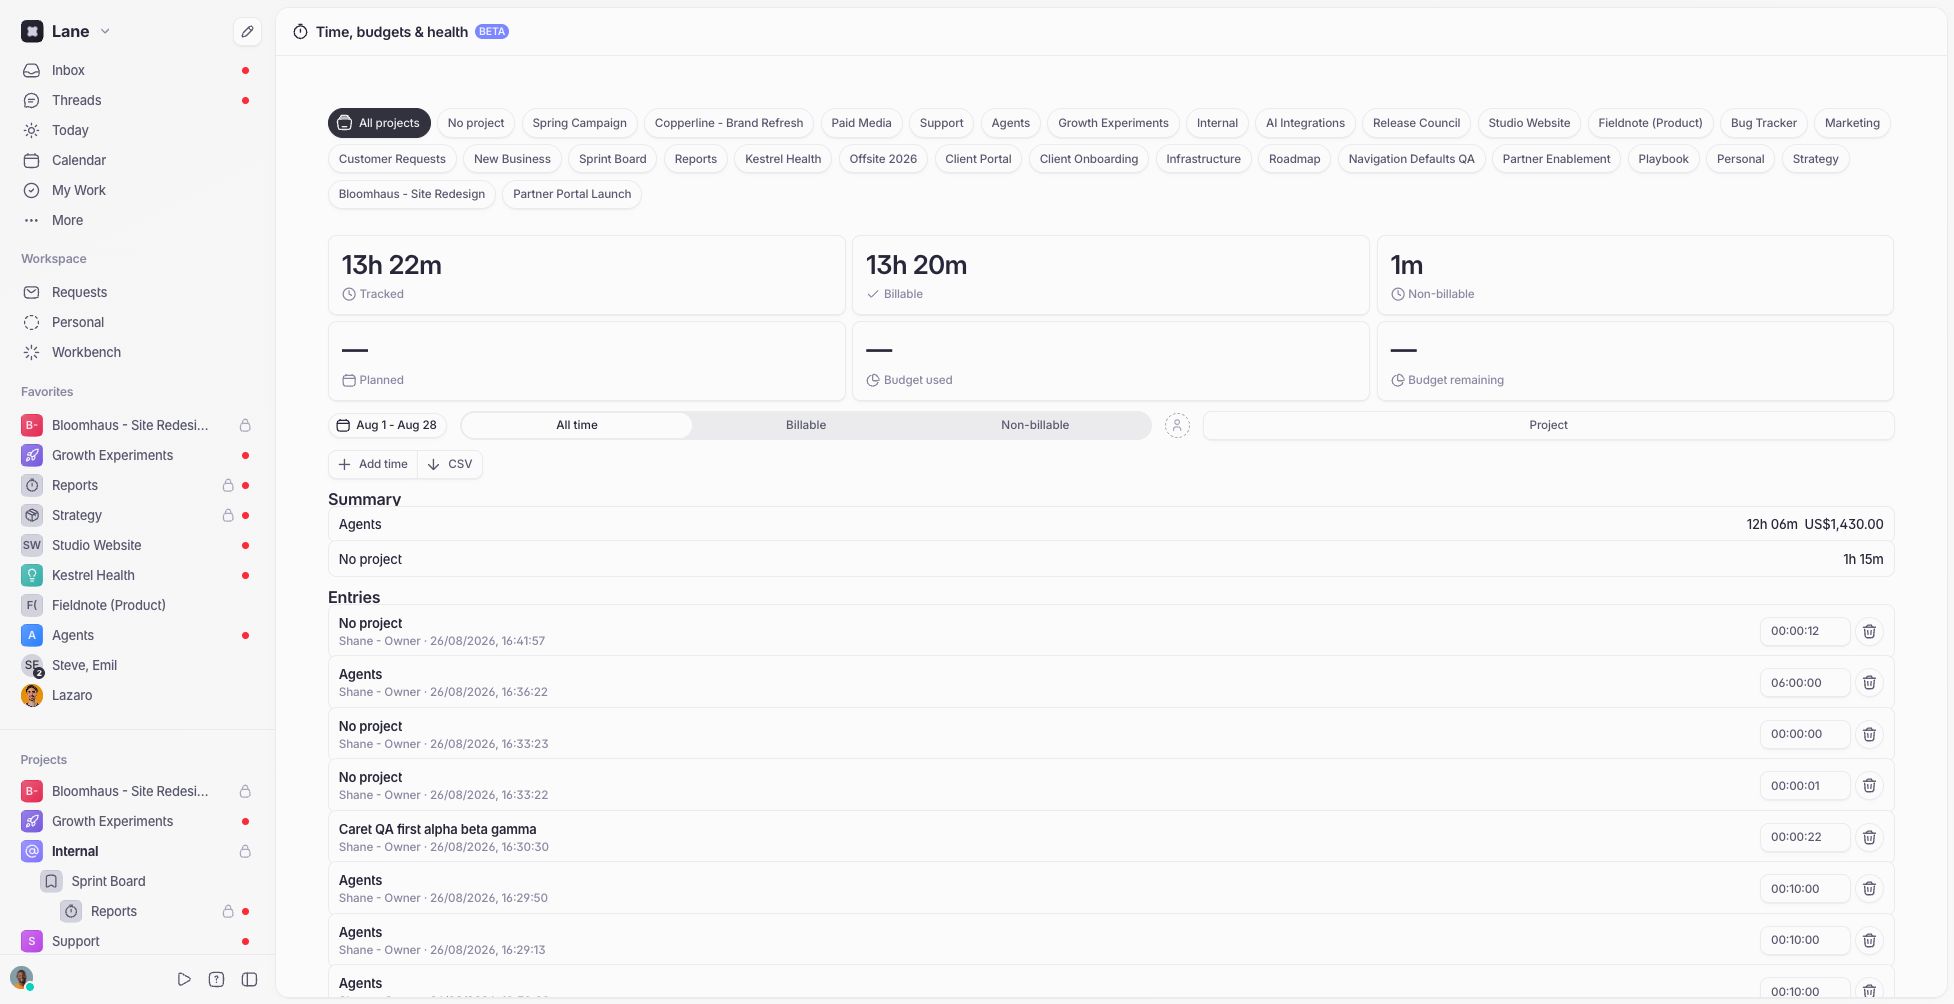
Use the controls above the report to:
- select a project or work with no project;
- choose a date range or clear it for all time;
- show all, billable, or non-billable entries; and
- group the summary by day, project, team member, cycle, or section.
Scroll to the bottom of a long report to load older entries. Select an entry to edit its description, project, task, or billable setting; its duration can be edited directly in the list.
Choose CSV to export the entries that match the current filters. Workspace and project admins also receive the available rate, currency, and billable-value columns.
Rates are captured when an entry starts, so changing a rate later does not rewrite historical time. See Budgets & Rates to configure project economics and budget periods.